Radian is a desktop tool built by the Koidev Studio team that lets you design, preview, and export radial elements for watchfaces — tick marks, rings, curved typography — all rendered in real time with a vector engine. This guide covers two ways to get it running: downloading the executable (simplest, no setup required) or running from source (recommended if you want to stay up to date with future releases).
Option A — Download the executable
The simplest way to run Radian. No Python, no terminal, no setup of any kind.
- Go to the Radian v1.0 release page.
- Under Assets, download
radian.exe. - Once downloaded, double-click it to launch Radian — no installation needed.
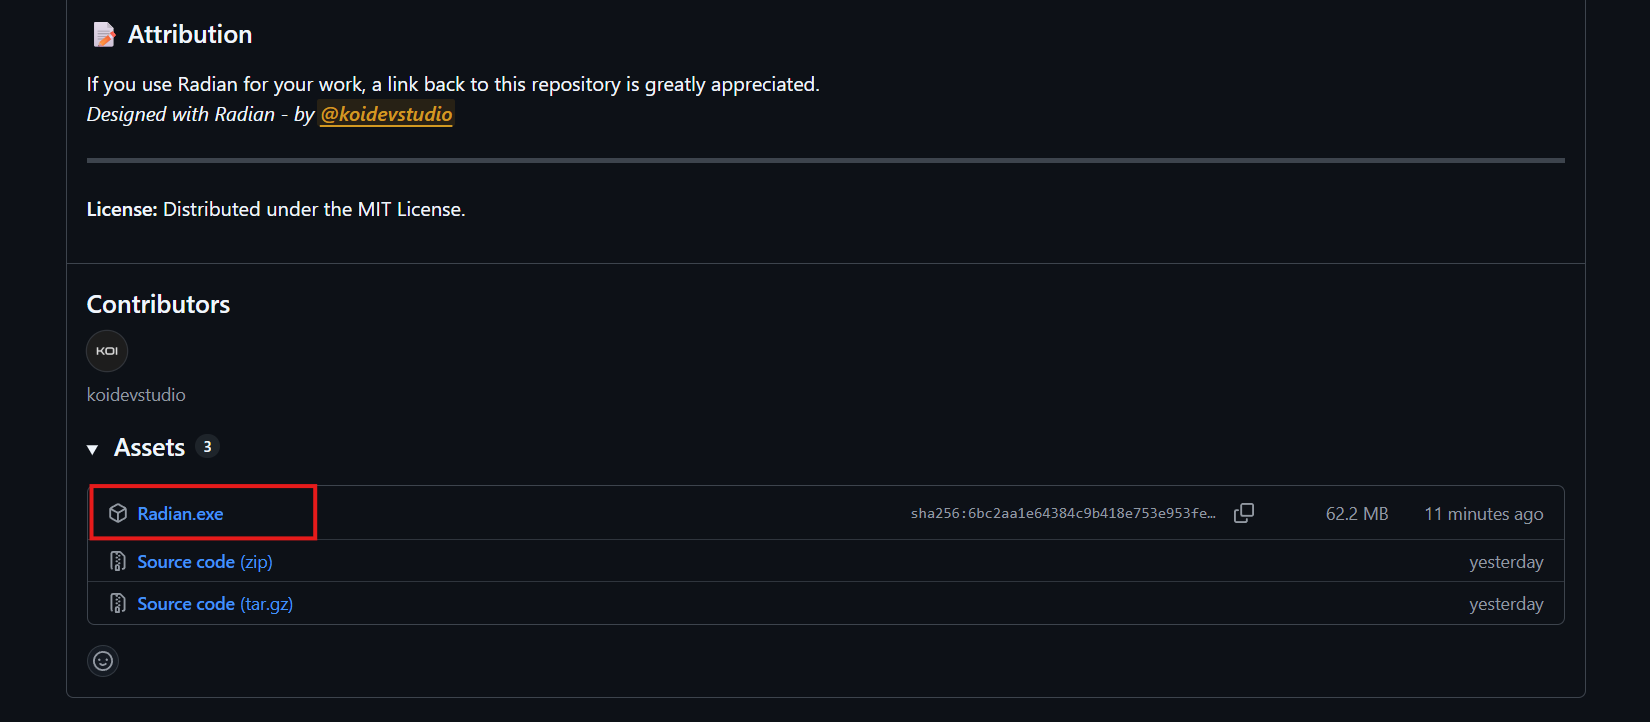
That’s it. The Radian window will open with the live canvas and controls panel.
About the Windows Defender warning
When you run radian.exe for the first time, Windows may show a blue alert that says “Windows protected your PC”. This is expected and not a sign that the file is dangerous.
The warning appears because the executable isn’t signed with a paid code-signing certificate — a process that costs hundreds of dollars per year and isn’t practical for a small independent tool. Windows flags any unsigned .exe by default, regardless of whether it’s safe or not.
To proceed:
- Click More info on the alert dialog.
- A Run anyway button will appear — click it.
Radian will launch normally. You’ll only see this prompt the first time. If you’d rather not deal with it at all, use Option B below — running from source never triggers this warning.
Option B — Run from source
This method requires a bit more setup but has a few advantages: no security prompts, and you can update to future versions with a single command. It’s also the approach to use if you’re on macOS.
1. Install Python
Radian requires Python 3.10 or newer. You won’t be writing code — the tool just runs on top of it.
Windows
- Open your browser and go to python.org/downloads.
- Click the big Download Python 3.x.x button. The site detects your OS automatically.
- Run the installer. Important: on the first screen, check the box that says “Add Python to PATH” before clicking Install Now. This step is easy to miss.
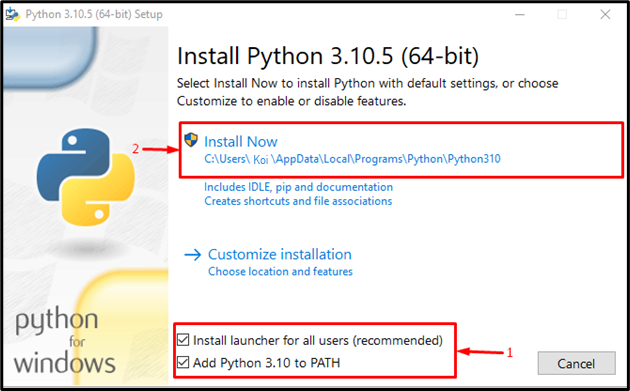
- Click Install Now and wait for it to finish.
macOS
macOS comes with an older Python, but you need 3.10+. Download the macOS installer (.pkg file) from python.org and run it following the default steps.
Verify the installation
Open a terminal:
- Windows: press
Win + R, typecmd, hit Enter. - macOS: open Terminal from Applications → Utilities.
Type the following and press Enter:
python --versionYou should see something like Python 3.12.3. If the number is below 3.10, re-run the installer. If you get an error on Windows, try python3 --version instead.
2. Download Radian
Choose one of the two methods below. ZIP is simpler. Git lets you pull future updates with a single command.
Download ZIP
- Go to github.com/koidevstudio/radian.
- Click the green Code button near the top right.
- Select Download ZIP.
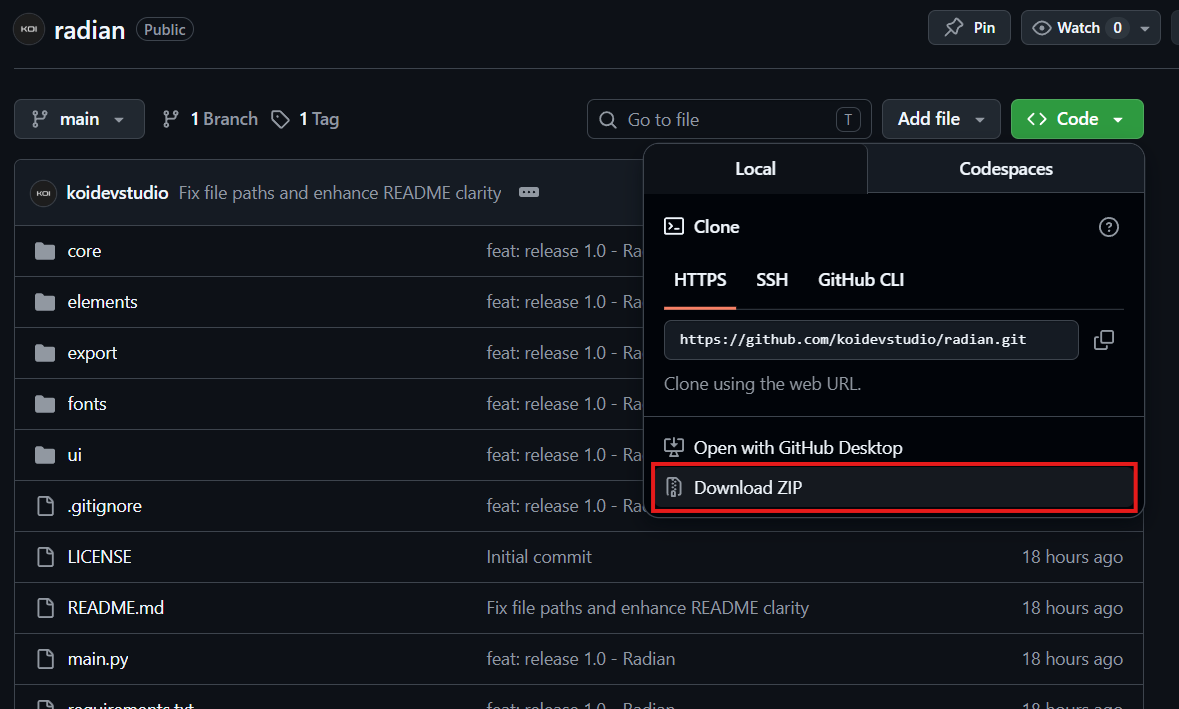
- Once downloaded, right-click the ZIP file and choose Extract All (Windows) or double-click it (macOS). Place the resulting
radian-mainfolder somewhere easy to find — your Desktop or Documents works fine. - Rename the folder to
radianif you like — it makes the next steps a little tidier.
Clone with Git
Git is a version control system that lets you download the project and stay in sync with future updates. If you don’t have it yet, download it from git-scm.com and install it with the default options.
Open your terminal and navigate to where you want to store the project. For example, to put it on your Desktop:
# Windows
cd %USERPROFILE%\Desktop

# macOS
cd ~/Desktop
Then clone the repository:
git clone https://github.com/koidevstudio/radian.gitThis creates a radian folder with all the files inside. When a new version is released, you can update by running git pull from inside that folder — no need to re-download anything.
3. Create a virtual environment
A virtual environment is an isolated space where Radian’s dependencies are installed without touching the rest of your system. Think of it as a dedicated shelf just for this tool.
Open your terminal and navigate into the radian folder:
# Windows
cd %USERPROFILE%\Desktop\radian

# macOS
cd ~/Desktop/radian
Tip for designers: the
cdcommand means “change directory” — it’s like double-clicking a folder in Finder or Explorer, but in the terminal.
Now create the virtual environment:
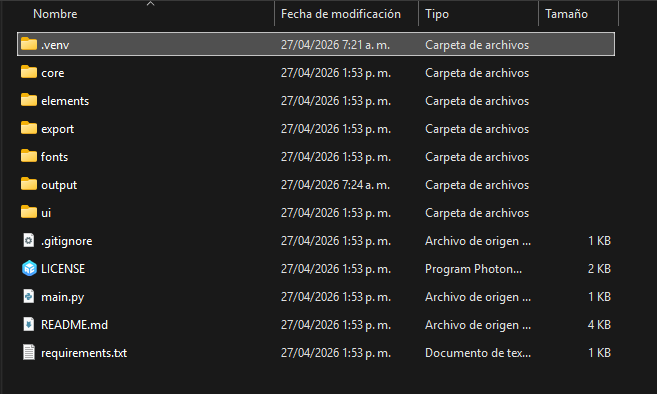
python -m venv .venvYou’ll see a new hidden folder called .venv appear inside radian. That’s the environment — no output message means it worked fine.
4. Activate the virtual environment
Every time you open a new terminal session to run Radian, you need to activate the environment first.
Windows:
.venv\Scripts\activate.batmacOS:
source .venv/bin/activateOnce activated, your terminal prompt changes to show (.venv) at the beginning of the line. That’s your confirmation that it’s active.
5. Install dependencies
With the virtual environment active, install the libraries Radian needs:
pip install -r requirements.txtThis reads the requirements.txt file in the project folder and downloads everything automatically. You’ll see a list of packages being downloaded — this is normal. It can take a minute or two depending on your connection.
When it finishes, you’ll see something like Successfully installed ... with the package names listed.
6. Run Radian
You’re all set. Launch the app with:
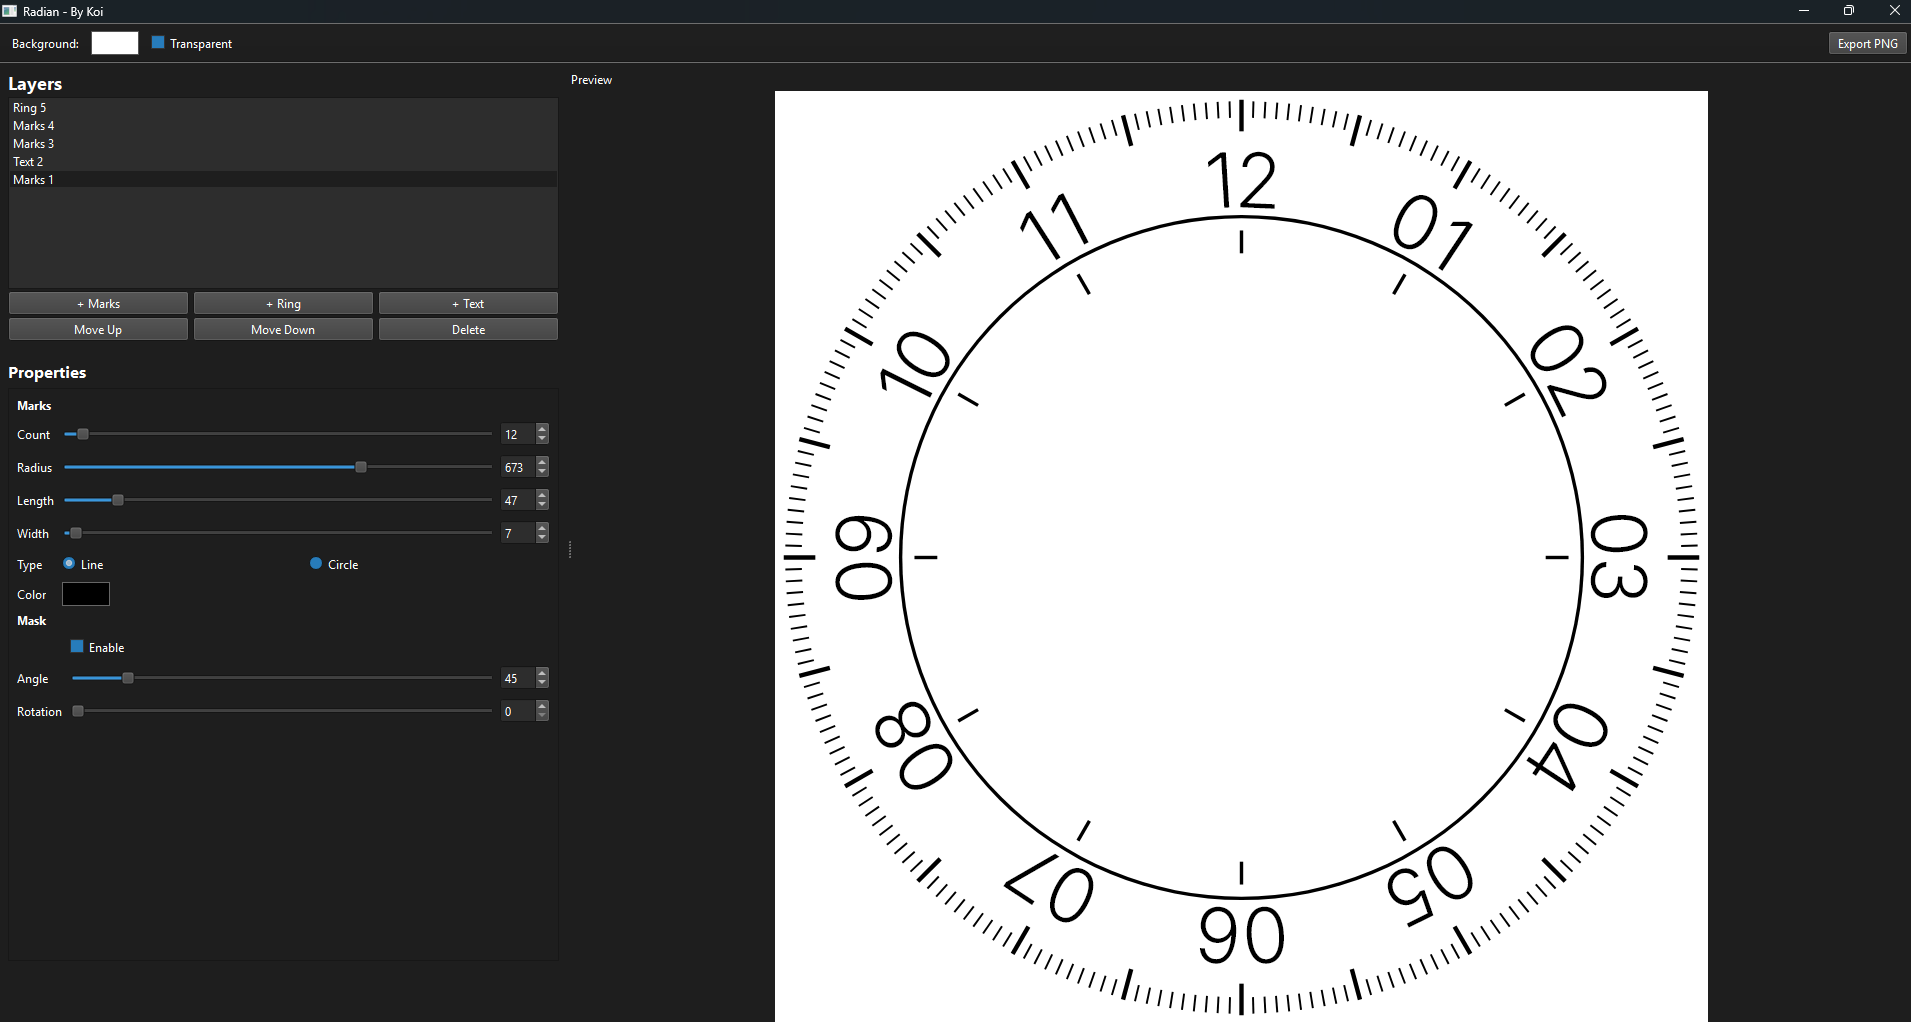
python main.pyThe Radian window will open — a live canvas on the right and the controls panel on the left.
What’s next
Once Radian is running, you can start building:
- Add elements — tick marks (Line or Circle style), filled rings, or curved typography — from the element controls.
- Adjust parameters in real time: radius, size, color, letter spacing, and more.
- Enable masking per element to create sector-shaped cutouts at any angle and rotation.
- Export your composition to the
output/folder inside the project, with or without a transparent background.
For a walkthrough of each tool inside Radian, see the next tutorial in this series.
Common issues
“Windows protected your PC” when running the .exe Click More info, then Run anyway. See the note about Defender above for context.
“python is not recognized” on Windows You likely skipped the “Add Python to PATH” step during installation. Re-run the Python installer, click Modify, and make sure “Add Python to environment variables” is checked.
Permission error when running activate.bat (Windows) Open PowerShell as administrator and run:
Set-ExecutionPolicy RemoteSigned -Scope CurrentUserThen go back to your regular terminal and try activating again.
pip install fails with a build error
Make sure you’re running Python 3.10 or newer (python --version). Some packages in requirements.txt require it.
The app window is blank or doesn’t open
Try re-running pip install -r requirements.txt with the virtual environment active to make sure all dependencies installed correctly.